

How To Register A Chromecast
Devices similar the Google Chromecast are designed for domicile networks. Connecting them to a complex enterprise network requires more steps. This article outlines the Chromecast setup steps for U of M residence hall use.
Important: You will need the MAC address of your Chromecast device to complete the registration procedure. Newer models exercise not list the MAC on the box or device. To find the MAC accost, you will demand to run through a partial setup and then register the MAC before completing the setup process.
- Registering your telephone equally an IoT device temporarily
- Starting the Chromecast configuration process
- Finding and registering your Chromecast MACAddress
- Completing the Chromecast configuration procedure
- Testing your Chromecast's connectivity
- Removing your phone'south IoT registration
Registering your phone equally an IoT device temporarily
For setup, your Chromecast and telephone need to be on the aforementioned WiFi network. To do that, your telephone needs to be temporarily registered equally an IoT device.
- Register Your Phone every bit an IoT Device following the steps outlined to register a streaming device for WiFi access.
Starting the Chromecast configuration process
- Download and install the Google Habitation app on your phone.
- Connect your telephone to the UofM-Invitee WiFi network.
- Note: While continued to the UofM-Guest, you won't have access to many U of Thousand services that crave cardinal authentication. Those services require your device to use the eduroam network. Afterward completing this process, return your phone to eduroam.
- Connect your Chromecast to a display, and make sure it is on.
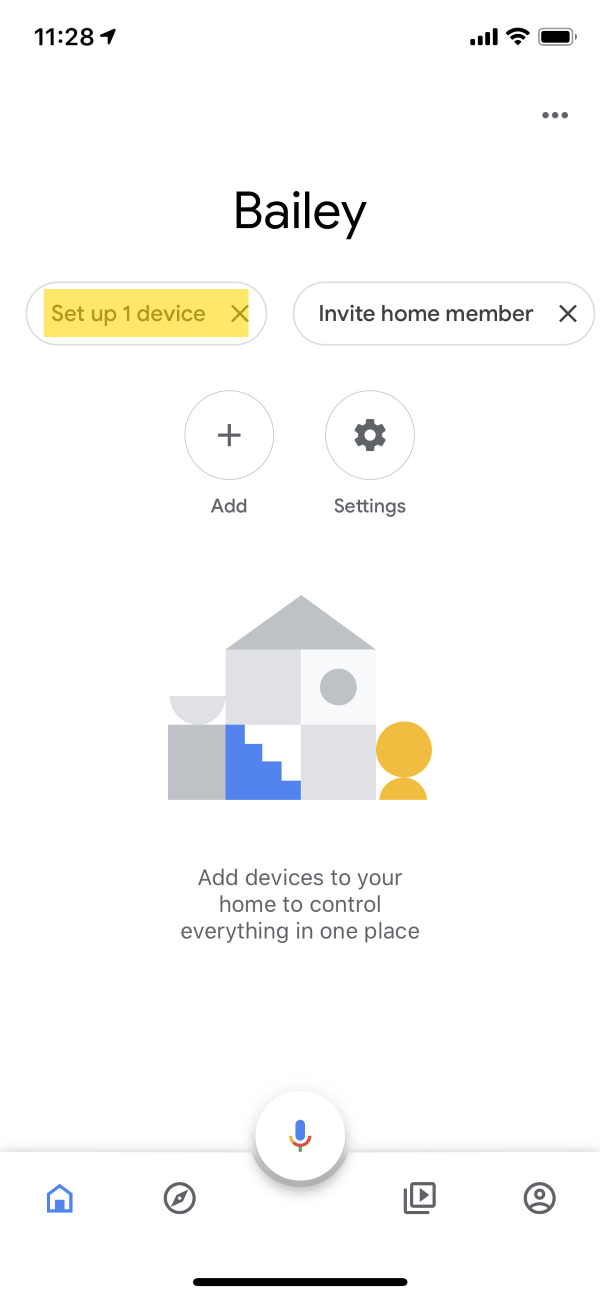
- Open the Google Home app.
- TouchSet up 1 device.
- Cull your location.
- TouchNext. The app will at present scan for your device. Later scanning, the app will display your device.
- TouchNext. You'll run across a code on your display and in the app.
- TouchYes.You volition see the room select surface area.
- Choose a room from the list.
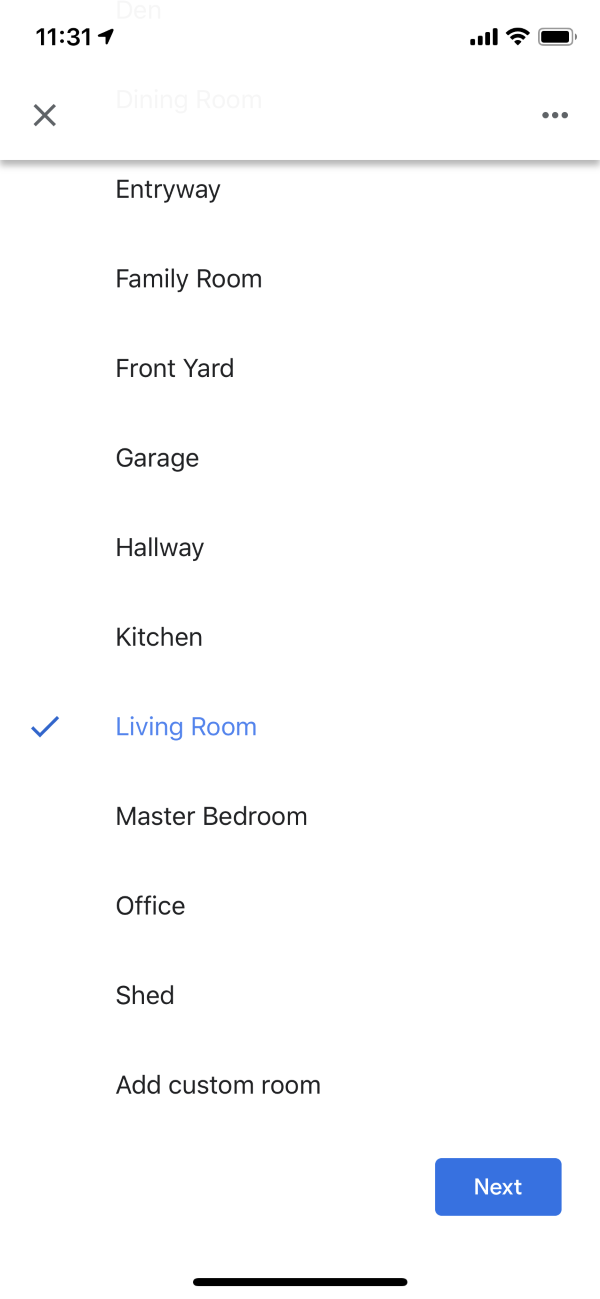
- Touch Next to begin finding and registering your Chromecast Mac Address.
Finding and registering your Chromecast MAC Address
You will need to observe and register your Chromecast Mac Address so you can consummate the Chromecast Configuration process.
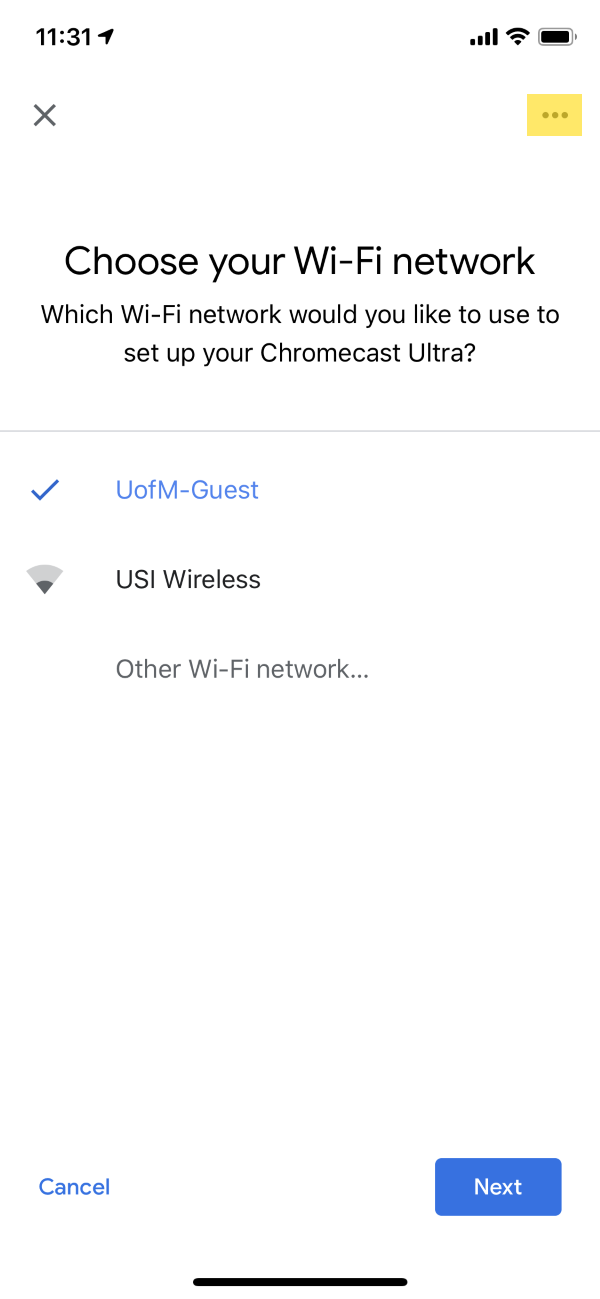
- Choose the UofM-Invitee WiFi network.
- Do Non touch Next.
- Touch the 3 dots in the upper right corner of the screen.
The screen refreshes. - Touch Show MAC address
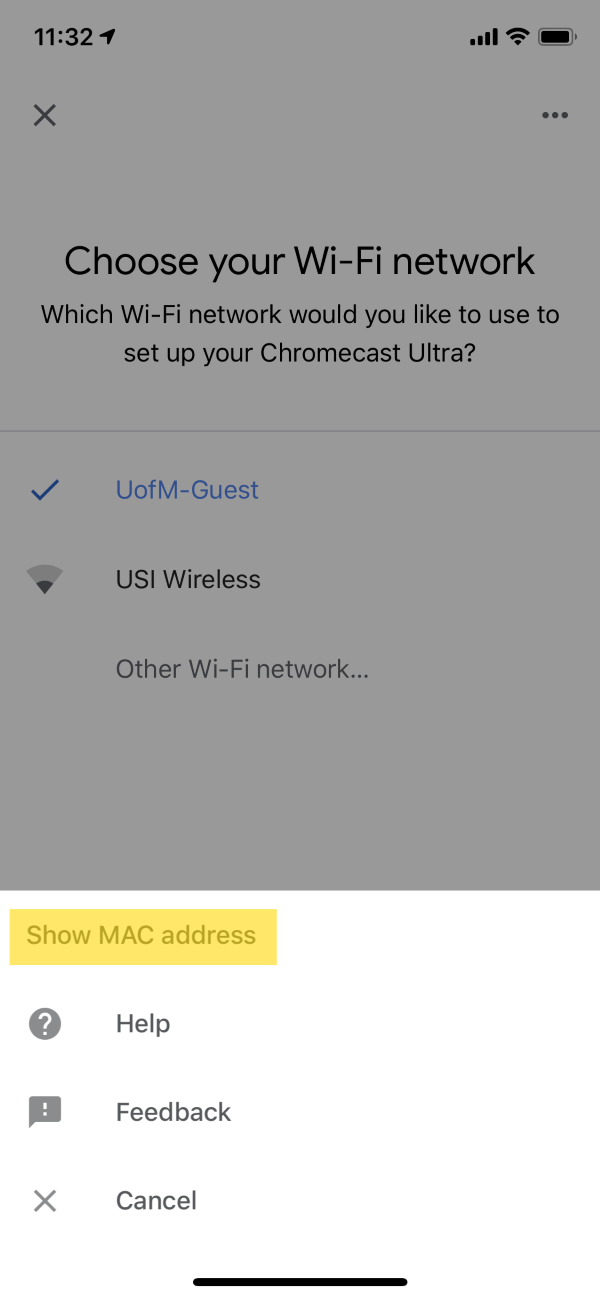
- Note the displayed MAC address.
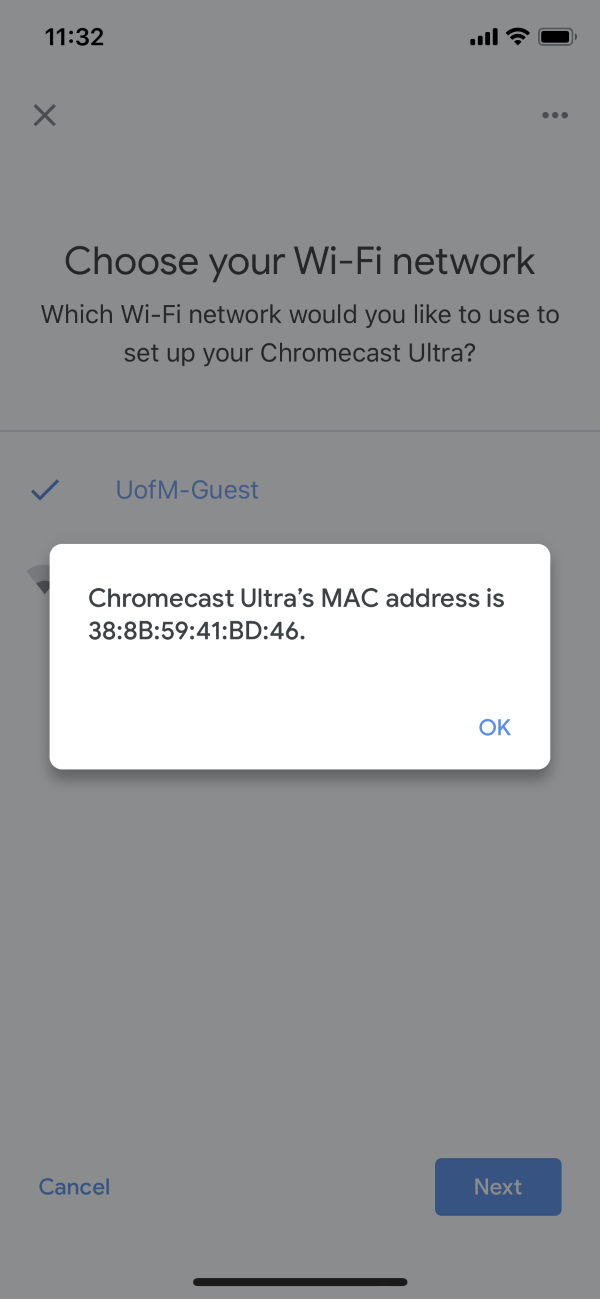
- Employ the MAC address displayed to register your Chromecast.
After your Chromecast is registered, you can complete the Chromecast configuration process.
Completing the Chromecast configuration procedure
- Resume the setup process.
- If you need to restart the process, go back to Starting the Chromecast Configuration Process.
- Select UofM-Guest.
- Touch Next. The Chromecast and Abode app will link up.
- Impact Go on.The Almost done! folio appears.
- Review your configuration on the Most done! folio.
- Touch Next.
- You may see a screen asking if you desire to automatically share data, and crash reports with Google. Touch No thanks orYes, I'm in depending on your preferences.
- Bear upon Stop.
Testing your Chromecast'south connectivity
In one case you pass through the final acknowledgement screens and while your phone is still on the UofM-Guest WiFi network, connect to your Chromecast using an app similar YouTube to display something.
Removing your phone'due south IoT registration
When you're finished setting up your Chromecast, remove your phone's IoT registration.
- Navigate to the WiFi Registration webpage, if inaccessible please try the alternating WiFi Registration webpage.
- Click on your phone's registration.
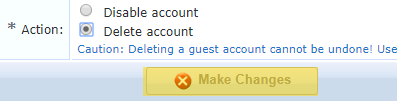
- Click Remove.A new box will appear below.

- SelectDelete.
- Click Make Changes.
Equally mentioned in the alarm in in a higher place, IoT devices will not be able to admission any authenticated services such as email. Removing your phone from the IoT database will forbid accidental connexion to the IoT network.

Source: https://it.umn.edu/services-technologies/how-tos/wifi-register-your-chromecast-device
Posted by: hendersonreand2000.blogspot.com
0 Response to "How To Register A Chromecast"
Post a Comment